Roasted Tomato and Sausage Pasta
I love the little orange Sun Sugar cherry tomatoes from William Dam Seeds www.damseeds.ca but in a good year they produce more tomatoes than we can use or give away since we have given all our friends and families their own plants to grow in the summer. They add a delicious taste and sweetness to tomato juice but sometimes I am not ready to make a pot of sauce so this pasta uses the excess and answers the question “what’s for dinner” in a very satisfactory way! It is adapted from Michael Smith’s “Cherry Tomato Penne” with a little more bounty from the garden added.
Roasted Tomato Sausage Pasta Sauce – For pdf version click here cherry-tomato-pasta
Nick recommended I try Michael Smith’s Roasted Cherry Tomato Penne and I was glad he did. I could not believe how simple and delicious this pasta dish was and it used a commodity that is difficult to preserve if you have an over abundance from the garden. Because I love roasted peppers and they are available at the same time as the tomatoes I included them with the sauce. I added the egg plant just to use them up one time and found they added a depth and creaminess to the dish that made it even better. This quick summer pasta dish has become a staple in our house.
1 Tbsp olive oil
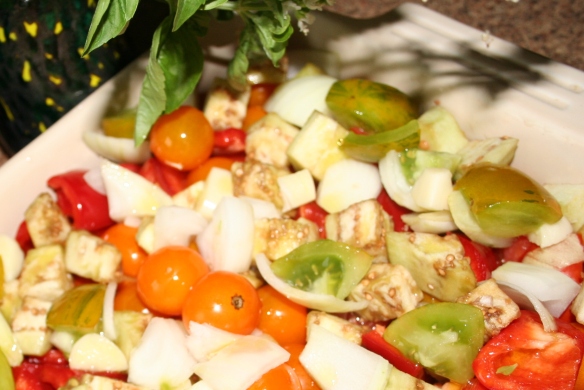
8 cups cherry tomatoes, I use a mixture of red, orange and any chopped larger tomatoes if needed
1 red or coloured sweet pepper, coarsely chopped
1 small to medium egg plant, peeled and cubed (optional)
1 large onion, coarsely chopped
4 cloves garlic
6 garlic sausage (500 g) or sausage of choice – It’s fine to use up smoked sausage
salt and pepper generously sprinkled over all
8 -12 ounces Gluten-free pasta shells or penne, I use an 8 oz box
1 large handful of fresh basil, about 4 stems, remove leaves and chiffonade
Grated Parmesan cheese as desired
- Place olive oil, tomatoes, pepper, egg plant (optional), onion and garlic in a large roasting pan so vegetables are essentially in a single layer and roast at 400 °F for 30 minutes. I actually use 2 lasagna pans to spread them out and combine them after they are cooked.
- Cut sausage into 1/2 inch pieces and add to roasted vegetables and continue roasting until sausage is browned, about 30 – 40 more minutes..
- Cook pasta in salted water according to package directions when sausage is almost done.
- To chiffonade basil leaves pile leaves together and roll. Cut through all leaves at once in narrow strips..
- Toss basil in with roasted tomato mixture when pasta is done and top with grated cheese if desired.
I have roasted all the vegetables with the sausage for the sauce and frozen it to use in the winter and was really glad to have it for a quick meal.
Serves 6 – 8


%20(640x448).jpg)


.JPG)

